

The Micro-Burst Epidemic: API Security Best Practices for 2026
March 12, 2026
Dutch Government Warns of Signal and WhatsApp Account Hijacking Attacks
March 19, 2026Azure Load Balancer Demystified: A Real-World Implementation with Linux VMs
Introduction
Imagine you run a production web application. Traffic is growing. One day, your single server gets overwhelmed, goes down, and takes your entire service with it. This is the classic single point of failure and it’s exactly what Azure Load Balancer is built to eliminate.
In this guide, we’ll walk through a real-world scenario: deploying three Ubuntu Linux virtual machines behind an Azure Standard Load Balancer, configuring health probes, load balancing rules, and verifying traffic distribution all from the Azure Portal. By the end, you’ll understand not just how to set it up, but why every enterprise architect relies on this pattern.
What Is Azure Load Balancer?
Azure Load Balancer is a Layer 4 (Transport Layer) network service that distributes inbound traffic across multiple backend resources — in our case, virtual machines. It operates at the TCP/UDP level, making routing decisions based on IP address and port number rather than application content.
There are two tiers and two types to understand:
- Standard vs Basic: Standard is production-grade — it supports availability zones, higher SLAs (99.99%), and advanced diagnostics. Basic is free but limited to 300 instances and no zone support.
- Public vs Internal: A Public Load Balancer exposes a public IP to route internet traffic to your VMs. An Internal Load Balancer distributes traffic within a virtual network (VNet) — ideal for microservices.
For this guide, we’ll use a Standard Public Load Balancer — the most common production setup.
The Scenario: A High-Availability Web Tier
We’ll simulate a real production scenario: a web application that must remain available even if one or more backend servers fail.
💡 Architecture at a Glance
- 3 x Ubuntu 22.04 LTS Virtual Machines (Standard_B1s tier — cheapest for testing)
- 1 x Azure Standard Public Load Balancer
- 1 x Backend Pool containing all 3 VMs
- 1 x Health Probe (HTTP on port 80)
- 1 x Load Balancing Rule (TCP port 80 → port 80)
- 1 x Virtual Network + Subnet
Each VM will run a simple Nginx web server. We’ll verify that traffic is distributed across all three machines by checking their hostnames in the response.
Prerequisites
- An active Azure subscription (free tier works — but note: Standard Load Balancer requires Standard SKU public IPs)
- Access to the Azure Portal (portal.azure.com)
- Basic familiarity with the Azure Portal UI
- SSH client (Terminal on Mac/Linux, or Windows Terminal / PuTTY on Windows)
💡 Cost Awareness
Standard_B1s VMs cost approximately $0.012/hour each. Running 3 VMs + a Standard Load Balancer for 1–2 hours
will cost under $0.20 total. Delete all resources after testing to avoid ongoing charges.
We’ll cover cleanup steps at the end of this guide.
Step 1: Create a Resource Group
Resource Groups are logical containers in Azure. Everything we create will live inside one group — making cleanup a single click.
Step 1: Navigate to Resource Groups
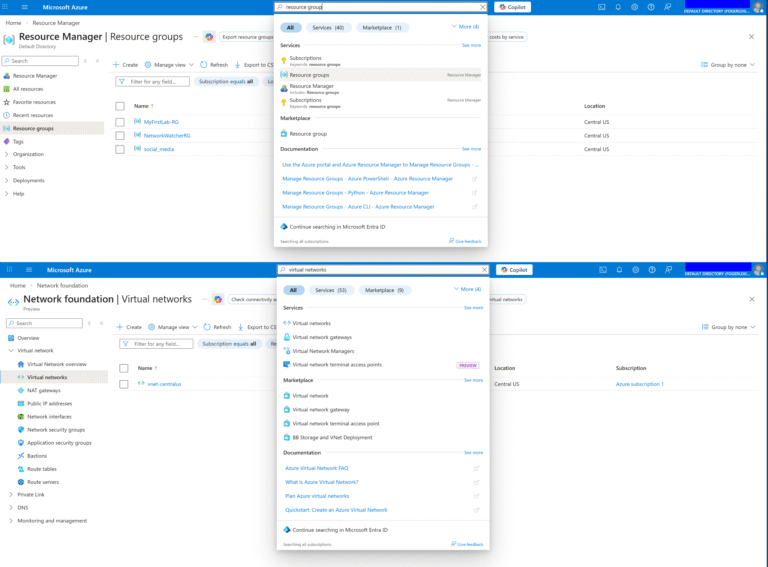
In the Azure Portal, search for “Resource groups” in the top search bar and click it.
Step 2: Create New
Click “+ Create”. Give it a name: lb-demo-rg. Choose your preferred region (e.g., East US). Click “Review + create” → “Create”.
Step 2: Create the Virtual Network
All three VMs and the Load Balancer need to live in the same Virtual Network (VNet).
Step 1: Go to Virtual Networks
Search for “Virtual networks” → “+ Create”.
Step 2: Configure
Resource Group: lb-demo-rg | Name: lb-demo-vnet | Region: East US
Step 3: IP Addressing
Under the “IP Addresses” tab, set Address space: 10.0.0.0/16. Add a subnet: Name: lb-subnet | Range: 10.0.0.0/24. Click “Review + create” → “Create”.
Step 3: Create the Network Security Group
An NSG acts as a virtual firewall for your VMs. We need to allow HTTP (port 80) for web traffic and SSH (port 22) for administration.
Step 1: Create NSG
Search “Network security groups” → “+ Create”. Name: lb-demo-nsg | RG: lb-demo-rg | Region: East US.
Step 2: Add Inbound Rules
After creation, go to “Inbound security rules” → “+ Add”. Add two rules:
- Rule 1: Source: Any | Destination port: 80 | Protocol: TCP | Action: Allow | Name: Allow-HTTP | Priority: 100
- Rule 2: Source: Any | Destination port: 22 | Protocol: TCP | Action: Allow | Name: Allow-SSH | Priority: 110
Step 4: Create Three Linux Virtual Machines
We’ll create all three VMs with the same configuration, pointing them to our VNet and NSG. Repeat these steps three times, naming the VMs vm-web-1, vm-web-2, and vm-web-3.
Step 1: Create VM
Search “Virtual machines” → “+ Create” → “Azure virtual machine”.
Basic settings for each VM:
- Resource Group: lb-demo-rg
- VM Name: vm-web-1 (then vm-web-2, vm-web-3)
- Region: East US
- Image: Ubuntu Server 22.04 LTS
- Size: Standard_B1s (cheapest option — search and select)
- Authentication: SSH public key (generate a new key pair and download the .pem file)
Step 2: Networking Tab
Set Virtual network: lb-demo-vnet | Subnet: lb-subnet | Public IP: None (we access them through the Load Balancer) | NIC NSG: Advanced → select lb-demo-nsg.
Step 3: Management Tab
No changes needed for this demo.
Step 4: Review + Create
Verify settings and click Create. Wait for deployment to complete. Repeat for vm-web-2 and vm-web-3.
💡 Pro Tip: Use ‘No public IP’ on VMs
Setting no public IP on individual VMs is a security best practice. All external traffic flows through the Load Balancer,
giving you a single, controlled entry point. To SSH into VMs for setup, use Azure Bastion or a Jump Box.
Step 5: Install Nginx on Each VM
Since we disabled public IPs on our VMs, we’ll use Azure Bastion or temporarily enable a public IP. For simplicity in this demo, we’ll use the Azure Cloud Shell with the run-command feature.
For each VM (vm-web-1, vm-web-2, vm-web-3), go to the VM blade → ‘Run command’ → ‘RunShellScript’ and paste:
sudo apt update && sudo apt install nginx -y
hostname=$(hostname)
echo “<h1>Hello from $hostname</h1>” | sudo tee /var/www/html/index.html
sudo systemctl enable nginx && sudo systemctl start nginx
This installs Nginx and sets a custom homepage showing the VM’s hostname — so we can confirm which VM is serving each request.
Step 6: Create the Azure Load Balancer
Now for the centerpiece of our architecture.
Step 1: Navigate to Load Balancers
Search “Load balancers” → “+ Create”.
Step 2: Basics Tab
Resource Group: lb-demo-rg | Name: lb-demo-lb | Region: East US | SKU: Standard | Type: Public | Tier: Regional
Step 3: Frontend IP
Click “+ Add a frontend IP configuration”. Name: lb-frontend-ip | IP version: IPv4 | Public IP: Create new → Name: lb-public-ip | SKU: Standard | Assignment: Static. Click Add.
Step 4: Backend Pool
Click “+ Add a backend pool”. Name: lb-backend-pool | Virtual network: lb-demo-vnet. Under “IP configurations”, click “+ Add” and select all three VMs (vm-web-1, vm-web-2, vm-web-3). Click Add.
Step 5: Inbound Rules — Health Probe
Under “Inbound rules”, click “+ Add a health probe”. Name: http-health-probe | Protocol: HTTP | Port: 80 | Path: / | Interval: 5 seconds | Unhealthy threshold: 2. Click Add.
Step 6: Inbound Rules — LB Rule
Click “+ Add a load balancing rule”. Name: http-lb-rule | Frontend IP: lb-frontend-ip | Backend pool: lb-backend-pool | Protocol: TCP | Port: 80 | Backend port: 80 | Health probe: http-health-probe | Session persistence: None | Idle timeout: 4 min | Enable TCP reset: Yes. Click Add.
Step 7: Review + Create
Click ‘Review + create’ → ‘Create’. Deployment takes 1–2 minutes.
Step 7: Verify Traffic Distribution
Once the Load Balancer is deployed:
Step 1: Get Public IP
Go to the Load Balancer blade → ‘Frontend IP configuration’ → copy the public IP address.
Step 2: Test in Browser
Open a browser and navigate to http://<your-lb-public-ip>. You should see “Hello from vm-web-1” (or vm-web-2, or vm-web-3).
Step 3: Test Distribution
In your terminal, run:
for i in {1..9}; do curl -s http://<your-lb-public-ip>; done
You should see responses cycling across all three VMs, confirming that the Round Robin algorithm is distributing traffic evenly.
Step 4: Test Failover
Stop Nginx on one VM using Run command: sudo systemctl stop nginx. Wait 10 seconds (2 health probe intervals), then re-run the curl loop. Notice that the stopped VM no longer appears in responses — the load balancer has automatically removed it from the rotation.
When to Use Azure Load Balancer: Decision Guide
Here is a practical reference for choosing the right load balancing configuration:
Scenario | Recommended Tier | Reason |
Public-facing web app | Standard Public | Global health probes + zones |
Internal microservices | Standard Internal | Private IP routing |
Small dev/test env | Basic Public | Low cost, simple setup |
Multi-region failover | Standard + Traffic Manager | Cross-region resilience |
Key Benefits of Azure Load Balancer
- High Availability: Automatically detects unhealthy instances via health probes and removes them from rotation — zero manual intervention required.
- Scalability: Add or remove VMs from the backend pool at any time without reconfiguring the Load Balancer or changing your DNS/IP.
- Zone Redundancy (Standard SKU): Traffic can be distributed across Availability Zones within a region, surviving entire datacenter failures.
- Cost Efficiency: You pay for what you use. No upfront licensing, no complex appliances. Standard LB pricing starts at ~$0.005/hour.
- Low Latency: As a Layer 4 service, Azure Load Balancer has microsecond-level overhead — unlike application-layer proxies.
- Outbound Connectivity: Standard Load Balancer provides SNAT (Source NAT) for outbound internet connectivity from VMs with no public IPs.
Cleanup: Delete All Resources
As promised, here’s how to remove everything and stop incurring charges with a single action:
Step 1: Go to Resource Groups
In the Azure Portal, navigate to “Resource groups” → select lb-demo-rg.
Step 2: Delete Group
Click “Delete resource group”. Type the resource group name to confirm. Click “Delete”.
This deletes all VMs, disks, NICs, the VNet, NSG, Load Balancer, and Public IP — everything we created. Azure handles dependency ordering automatically.
Conclusion
In under an hour, we’ve moved from zero to a production-grade, highly available web tier on Azure. Three Linux VMs, one Load Balancer, one public IP — and automatic failover built in.
This pattern is the foundation of virtually every enterprise cloud deployment. Once you understand it, you can extend it: add auto-scaling with VM Scale Sets, layer Azure Application Gateway in front for L7 routing, integrate with Azure Monitor for real-time dashboards, or connect it to Azure Traffic Manager for multi-region failover.
The cloud is not just about compute — it’s about resilience by design. Azure Load Balancer is where that resilience starts.
If you’d like help designing a production-ready Azure load-balancing setup (zones, health probes, NSGs, and monitoring) or want me to review your architecture before you deploy, feel free to contact me here
— I usually reply within 24–48 hours.